
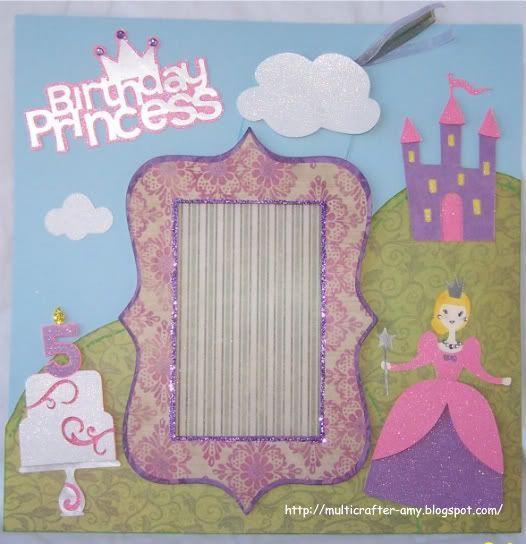
I wanted the castle to look like it was on a hill far away behind the princess.The hills in the background is made by welding two ovals together on my Gypsy. The ovals hang off the mat on the Gypsy where cutting is not needed. The frame is made with 5 layers. I used the Storybook and Plantin Schoolbook cartridges on my gypsy to create the frame. One layer was a cardstock reinforcement layer because this printed paper was not thick enough for me to pop up the first layer with foam squares. I wanted this to hold up to being place in a closed scrapbook. There are three layers for the top part then it was secured to the next two bottom layers with the foam dots. I glittered the inside of the frame with Martha Stewart glitter before attaching it to the bottom layer of the frame. Secure the bottom layer to the page before adding the top layer. It is easier to line them up straight this way.The bottom layers consisted of a cut out frame and solid behind it for the sole purpose cosmetics since we could not use a photo. Also I did not have any Princess photos, so this was a good thing for me.lol I also made this so that whoever ends up with this page can actually use the page. I left a slot unglued on the right side so a picture could be added. The title was cut from silver and metallic paper and and pink glitter paper. I cut the original candles off the the cake (from Celebrate with a Flourish) and added a number five candle. To make the candle I cut a five from the Birthday Cakes cartridge. I them cut a candle blown up for the the frame from the Celebrate with a Flourish cartridge. I just used the flame and gold Martha Stewart glitter. The white part of the cake was popped up with foam squares.
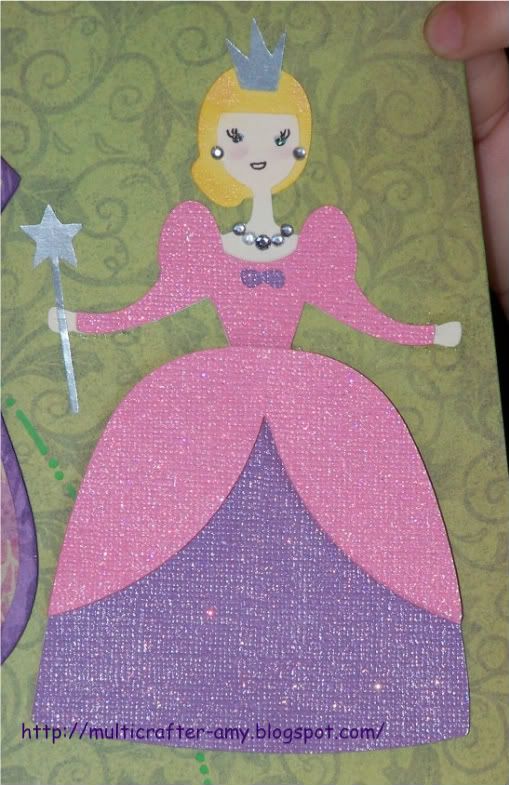 The princess is cut from the Birthday Cakes cartridge that is designed for the Cricut Cake Machine. So it does not have a bunch of layers for it so I made more by cutting extra layers in different colors and my handy scissors. I used two pink glitter cardstock cuts of the dress to make it pop. I wanted the bottom part to poof out so I made a second of the same cut and cut it at the waist and just used the bottom part and foam squares. I also cut two bottom layers. I cut one flesh tone and one in purple glittler cardstock and trimmed with a scissors where needed. Her face was drawn on by using a piece cut with the face as a stencil and hand drawn eyelashes. I used hide contour to hide her face on the flesh tone paper. Then I chalked her face to add life and some rhinestones for her jewelery. I used a cream metallic chalk for her hair. I just barely used aqua Stickles for her eyes.
Cartridges used
Birthday Cakes - Princess, Castle, Number5, Title
Celebrate with a Flourish - Cake
Storybook - To make the frame
Plantin Schoolbook - Tags and square for the frame cut out.
Winnie the pooh and Friends – Clouds
Paper used
Printed paper is from a paper stack- Inspirations by Memory Block
Purple, Pink, White glitter paper.
Blue cardstock
Silver metallic paper
Martha Stewart glitter, Ribbon by Offray
Please check back for my other two layouts. I will post them later today. Please leave a comment below. I like your feedback. Also if you like my work, please follow me. I have a lot of projects in the works that I will be posting soon.
I love this LO. I saw it on the cricut mb. Adorable!!!
ReplyDelete