Monday, April 25, 2011

Cricut Fifth Anniversary Challenge Third Entry

This is my favorite of my three entries. I used seven cartridges to do this page. I know that's a lot but it's one way to justify owning them. lol It was the first one I did and I took the most time making it. I also produced a lot of wasted paper trying to get it right. I tried to use cartridges that don't normally get associated with a birthday. I hated to send this one off knowing I would not get it back but I didn't have a chance at winning if I didn't. I call this one the :

Over The Hill, 40th Birthday Page


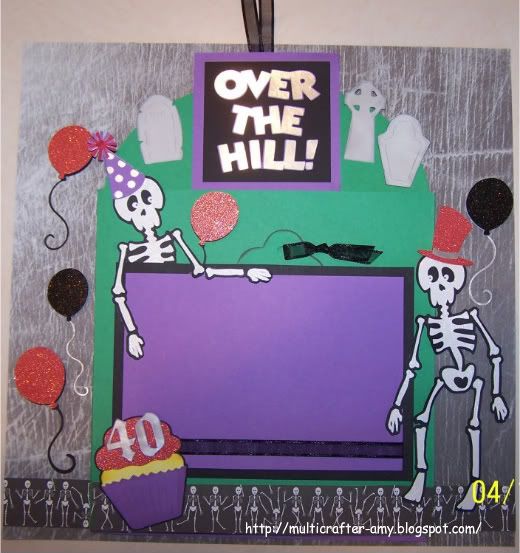
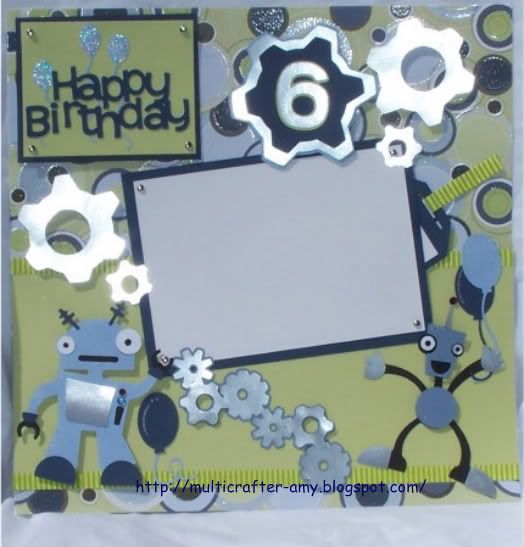
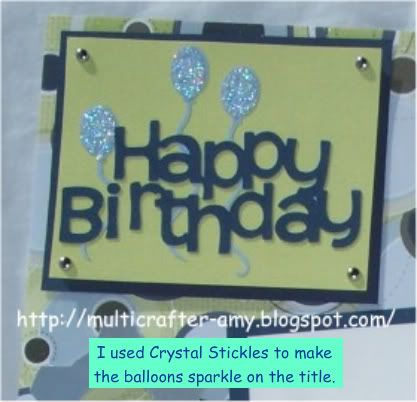
I just love my Happy Hauntings cartridge. These skeletons were just right for the birthday theme. They looked ready to party. Also I had to have two of them. What's a party without two. I flipped one of them on my gypsy so he would look different and added a hat from Celebrations. Then I cut the legs off the one behind the mat. I also cut his one arm to better frame the mat. I wanted to do the dreaded 40th birthday with a dark but a happy party feel to it. I think I achieved what I was going for. The top is suppose to resemble a hill in a grave yard (over the hill). I used white glitter paper for the Skeletons. I did feel like using a lot of of glitter and metallic paper on all of my entries. I was just in the mood to see everything sparkle. Plus glitter and metallic paper added just the right pop to the page against a dark grey background. I popped all the balloons up with foam dots. I used black and red glitter paper for all the balloons. The Skeleton to the right is popped up to the level of the slider pocket with glue dots and foam squares. He isn't going anywhere! Don't you just love his red glitter top hat.


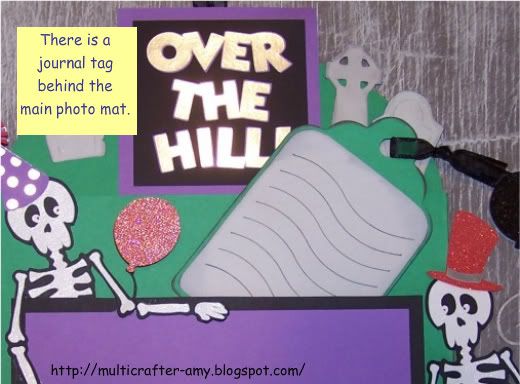
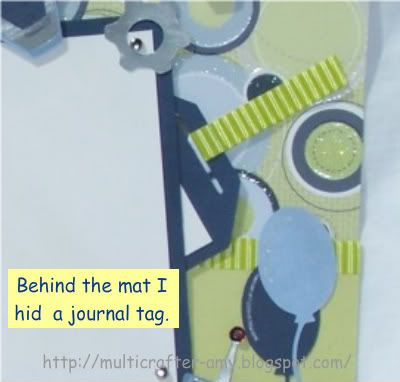
A proper scrapbook page must have space to journal so I tucked a journal tag behind the front mat.

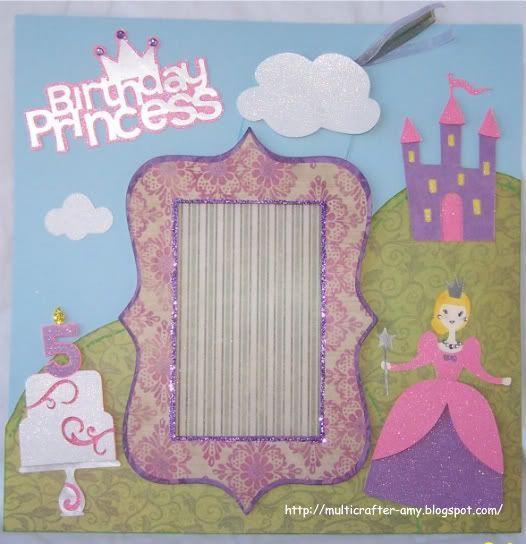
Now here is the surprise to my page. It has a slider pocket! It is a lot like a double slider card but on a bigger scale and designed to fit on a scrapbook page. You use a strip of plastic cut from a plastic bag and attach the tags to it so that they slider in and out of the pocket. This allow you to add more pictures, accents and journaling.

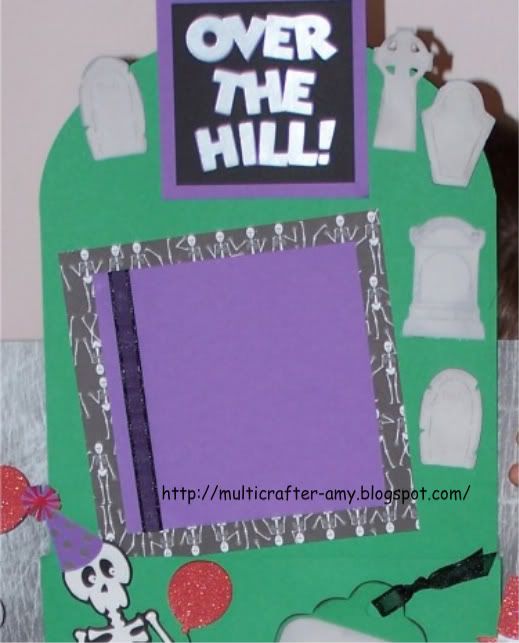
On the top tag, The hill gets bigger and shows a spot for another picture and more grave stones. I took gravestones from two different cartridges, October 31st and Paper Doll Dress Up. I used the Gypsy's hide contour so I could make the stones from October 31st have two layers.

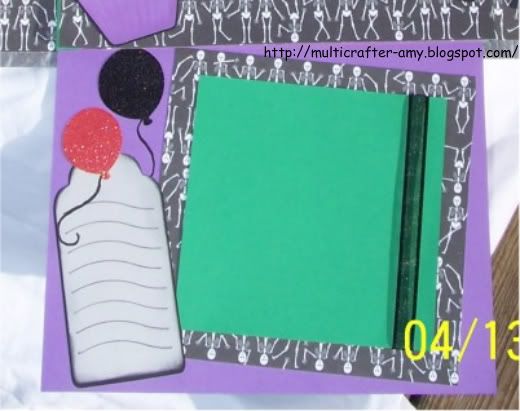
I drew the lines to the balloons on the bottom layers so they wouldn't get snagged when you shove the tag back in. All the stuff on the tags needed to be glued down very well so they would not get caught. I will need to remake this one. It was to neat not to. Well wish me luck! I think this is my best chance at winning the contest. Please leave me some comments below. I plan to add the size of the cuts to all my post later they are all stored in my Gypsy in a file.

Cartridges used

Happy Hauntings- Skeletons,

October 31st Seasonal - Grave stones

Celebrations – Balloons, cupcake

Plantin Schoolbook- tags and slider tags (welded an oval and Square)

Blackletter- 40 ( on cupcake )

Mickey Font- Title cut

Paper doll Dress Up- Grave Stones

Paper Used

Black and Grey base paper is from a G.D.C. studios Zen Garden

Metallic Silver

White, Black, and Red glitter Cardstock

Purple, Green, Gray, Yellow, and Black

Skeleton paper - me and my BIG ideas

Ribbon from American Crafts


Cricut Fifth Anniversary Challenge 2nd Entry

I have been wanting to use my Robotz cartridge that I just had to have. I might use this them for middle son's 6th birthday later this year. I just love how these little robots turned out. My boys were so interested in this page. They wanted the extra robots that I made. So why not. They then made their own projects while I worked on the challenge. I used a lot of Metallic Paper on this layout. The paper I used as the base was so busy. It was specialty paper. The picture does it no justice. It had metallic shine to it. I toned it down by using a lot of solid paper. The robots had to have some bling for the antenna and the buttons. See I may have boys but there is always a way to add sparkle. The robots had to have balloons for the birthday party theme. I also used silver little brads. I place the one robot to look like he was turning the brad. I also used foam squares to pop him up on the page. The other robot just looks like he is having a blast don't he? I cut double of his main body parts (blue parts) and foam squared them to add dimension to his body. I also used foam squares for the title, gears and layered gear with the number six. The light green base paper is trimmed with some self adhesive ribbon. I also used that ribbon on the journal tag. I know these photos are not the best but I was in a hurry to get this shipped out for the contest in time. I am also in the process of making my own light box to be able to take brighter pictures.


Cartridge used

Robotz – Robots, number

Birthday Cakes- - Gears, Title and Balloons

Tags bags boxes and more – tag

Paper used

Baby boy circles –Cloud nine designs- Fiskars

Metallic Silver

Shades of Blue, green, black and white cardstock

Ribbon from Offray and icicle stickles.


In my next post I will show you my favorite of my entries. I saved the best for last.

Cricut Fifth Anniversary Challenge

This is the first of three layouts that I made for the challenge. I could not resist trying to win the new E2 from Provo Craft. We were allowed to enter three one page 12 x12 scrapbook layouts with a birthday theme. For this one I decided to make a princess birthday theme because I have all boys and really wanted to make some girly cuts. lol I used a ton of sparkle for this layout. Sorry this is a long post do to all the details of how this page was made.

I wanted the castle to look like it was on a hill far away behind the princess.The hills in the background is made by welding two ovals together on my Gypsy. The ovals hang off the mat on the Gypsy where cutting is not needed. The frame is made with 5 layers. I used the Storybook and Plantin Schoolbook cartridges on my gypsy to create the frame. One layer was a cardstock reinforcement layer because this printed paper was not thick enough for me to pop up the first layer with foam squares. I wanted this to hold up to being place in a closed scrapbook. There are three layers for the top part then it was secured to the next two bottom layers with the foam dots. I glittered the inside of the frame with Martha Stewart glitter before attaching it to the bottom layer of the frame. Secure the bottom layer to the page before adding the top layer. It is easier to line them up straight this way.The bottom layers consisted of a cut out frame and solid behind it for the sole purpose cosmetics since we could not use a photo. Also I did not have any Princess photos, so this was a good thing for me.lol I also made this so that whoever ends up with this page can actually use the page. I left a slot unglued on the right side so a picture could be added. The title was cut from silver and metallic paper and and pink glitter paper. I cut the original candles off the the cake (from Celebrate with a Flourish) and added a number five candle. To make the candle I cut a five from the Birthday Cakes cartridge. I them cut a candle blown up for the the frame from the Celebrate with a Flourish cartridge. I just used the flame and gold Martha Stewart glitter. The white part of the cake was popped up with foam squares.


The princess is cut from the Birthday Cakes cartridge that is designed for the Cricut Cake Machine. So it does not have a bunch of layers for it so I made more by cutting extra layers in different colors and my handy scissors. I used two pink glitter cardstock cuts of the dress to make it pop. I wanted the bottom part to poof out so I made a second of the same cut and cut it at the waist and just used the bottom part and foam squares. I also cut two bottom layers. I cut one flesh tone and one in purple glittler cardstock and trimmed with a scissors where needed. Her face was drawn on by using a piece cut with the face as a stencil and hand drawn eyelashes. I used hide contour to hide her face on the flesh tone paper. Then I chalked her face to add life and some rhinestones for her jewelery. I used a cream metallic chalk for her hair. I just barely used aqua Stickles for her eyes.

Cartridges used

Birthday Cakes - Princess, Castle, Number5, Title

Celebrate with a Flourish - Cake

Storybook - To make the frame

Plantin Schoolbook - Tags and square for the frame cut out.

Winnie the pooh and Friends – Clouds

Paper used

Printed paper is from a paper stack- Inspirations by Memory Block

Purple, Pink, White glitter paper.

Blue cardstock

Silver metallic paper

Martha Stewart glitter, Ribbon by Offray

Please check back for my other two layouts. I will post them later today. Please leave a comment below. I like your feedback. Also if you like my work, please follow me. I have a lot of projects in the works that I will be posting soon.