Hi there!
This a shower invite for my little sisters baby shower. Oh and before you think the theme "She's Ready To Pop!" sounds mean you should know she insisted on the theme. I had a pink little elephant theme chosen....
Though we all know you want to keep the pregnant lady happy.. Right? YES of course we do.
I think it turned out great. The balloon was chosen because we all know they can go pop!
I hope you like it and if you want a prego lady like the hip one I put on this card you will
need Forever Young. No those chicks on that cartridge are not prego but if you weld an oval in just the right spot in design space or Cricut Craft room. POP! There you have a pregnant lady!!!
I will say these are just the first few I made. I don't have a copy of it but I changed the "POP!" from a cut out to being written with marker. Much faster and a lot less glue. So when you have 52 of these to make use the marker. Next I have to make a banner for the shower. But I won't be able to post it right away. Just in case my sister figures out I post theses things on my blog. I will need the banner to be a surprise. lol
Supplies
Forever Young Cricut Cartridge
a random oval image
plain cardstock
Cricut Explore marker for the "She's ready to"
Tuesday, October 21, 2014
Saturday, May 10, 2014
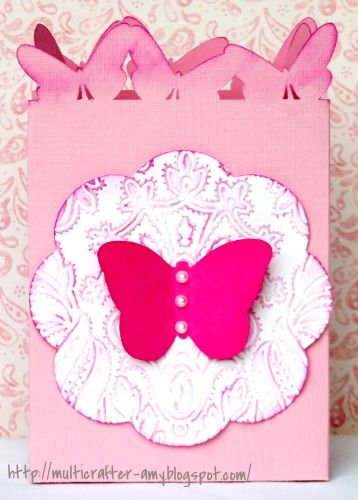
Butterfly Gift Bag
This is a bag I made for the Circleville NSD challenge over on
Go check out some of her great projects.
I used :
Anna Griffin Summer Soiree Cricut Cartridge
Lacy Labels Cricut Cartridge
A New Anna Griffin Cuttlebug Folder
Wednesday, May 7, 2014
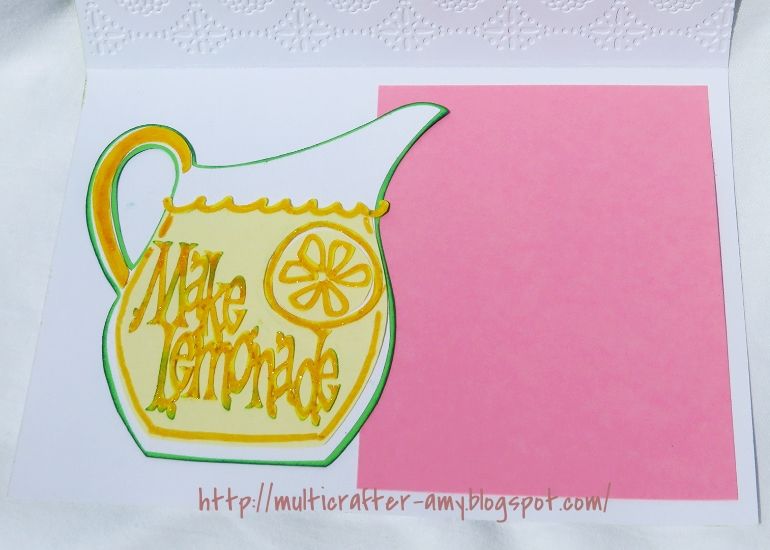
Pour Me Some Lemonade
Life is full of lemons and it's the knowing how to make lemonade that makes it all go away or at least helps.
Nice thought. In other words you have to make your own happiness.
Here is a great card to send to a friend when they get too many lemons sent their way.
Savory Cricut cartridge
Anna Griffin Cuttlebug folder
Sunday, May 4, 2014
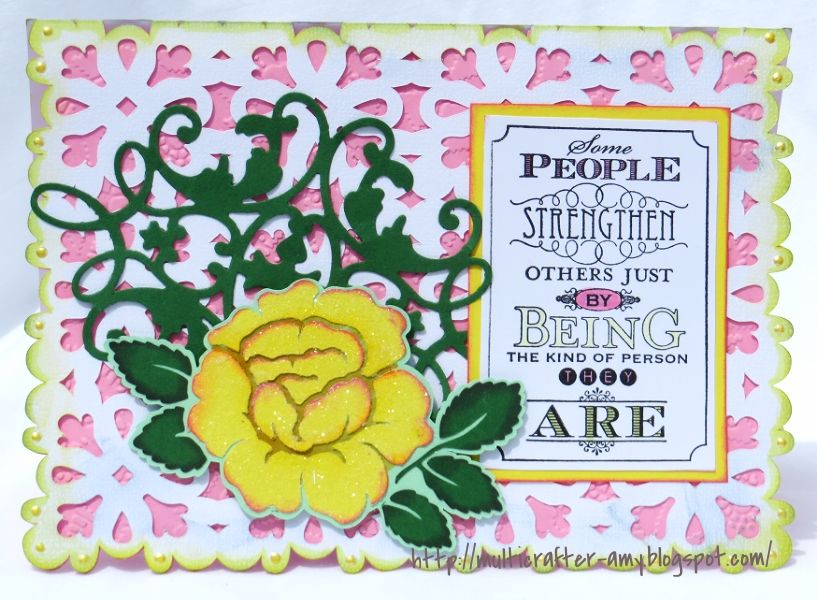
Take Time To Smell, I Meant Color The Roses
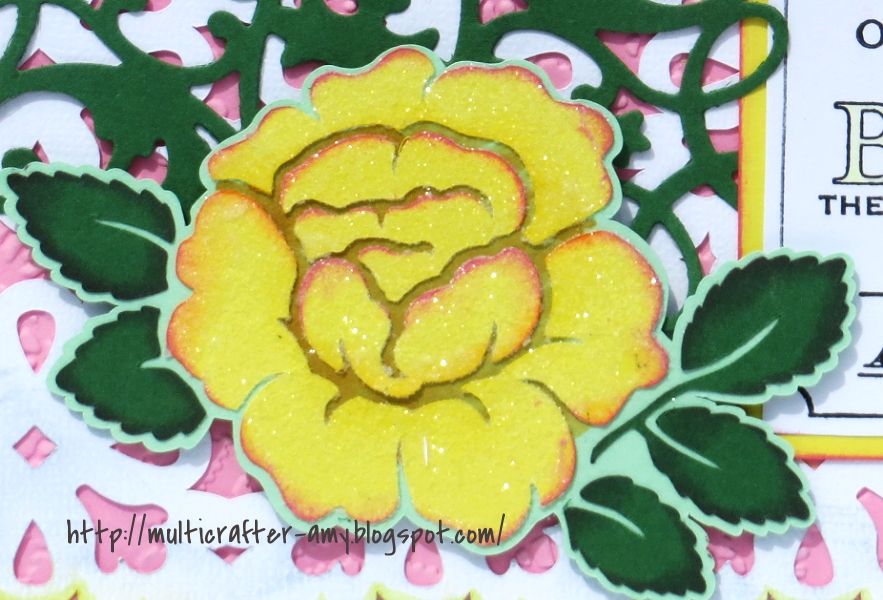
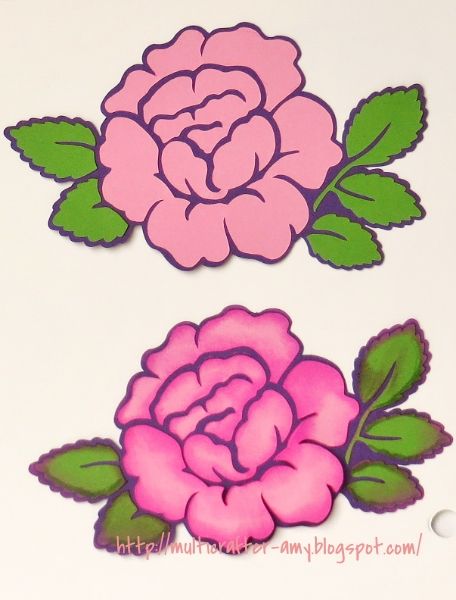
Do you ever look at the flowers on a cartridge and wonder how can I make these look more real or stand out. When I saw the Anna Griffin rose that comes with the HSN Explore I thought it needs to be more like an Anna Griffin flower. I have a card kit of hers and the flowers are one of the best parts of it. So I looked at my stash of assembled Anna Griffin cards with those flowers for inspiration. I also decided to add some glitter because well I just love glitter. So I made a ton of different roses but all from the same cut. It is amazing how much use you can get out of one image.
Now I used Studio G ink pads, copics, and opaque pens. It just takes a few dabs here and there and you really change your flowers and give them character. Also an important factor to consider on this cut is you may want to color the base cut where you add the petals. I used my copics in this area before I place my petals on the flower in the card below. Also don't forget rhinestones and brads make a great center for a card. I don't have any flowers like that pictured here but they are great accents. I just concentrated on showing you inked flowers and one image to show how different one image can be. Plus I did want to make this post any longer than it is. lol This will work an so many of the different flower cuts out there.
On this yellow rose I inked the edges pink and glittered the petals. The leaves were inked with green ink.
The top rose is untouched. The only thing I changed from the sample image in Design studio is the background from white to purple. Color can make a difference. The bottom is the same as the above but I inked the edges with an studio G ink pad you can find in the $ 1.00 bins at Joann's Michael's, or some of the the big grocery stores in their crafts section. It don't cost a lot to achieve this look.
I inked the petals with pink and the leaves with purple.
These flowers were cut with a black background and all white petals and leaves. The colors you see are all from me inking them with an ink pad. They will look great with chalkboard ink stamps and such.
These are harder to explain but if you like copics and like to color that's all you need. The copics have to be close to the shade of color paper you decide to use. I only own a handful of copics so I am limited in that aspect. Though someday I will try to increase my collection. I mostly color my cricut cuts with my copics. Now I was just playing with theses cut in attempt to create a painted look.
I also used different opaque pens to outline the petal and leaves.
The challenge is to alter a flower from any cricut cartridge and put it on a card or, scrapbook page, box or etc. So easy and fun!!! I do ask you submit a new project.. Link it here and make a comment below please,
It would be nice if you post to the Circle message board on my post to let me know you entered here. Thanks.
The prize is an extra of the stamp above that I bought and few other embellishment goodies to go with it !
Saturday, May 3, 2014
Make Mine A Mini
Welcome to my post for Circleville NSD Online Event!
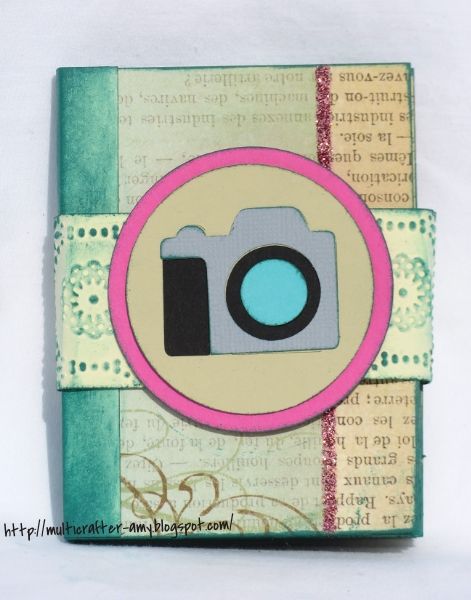
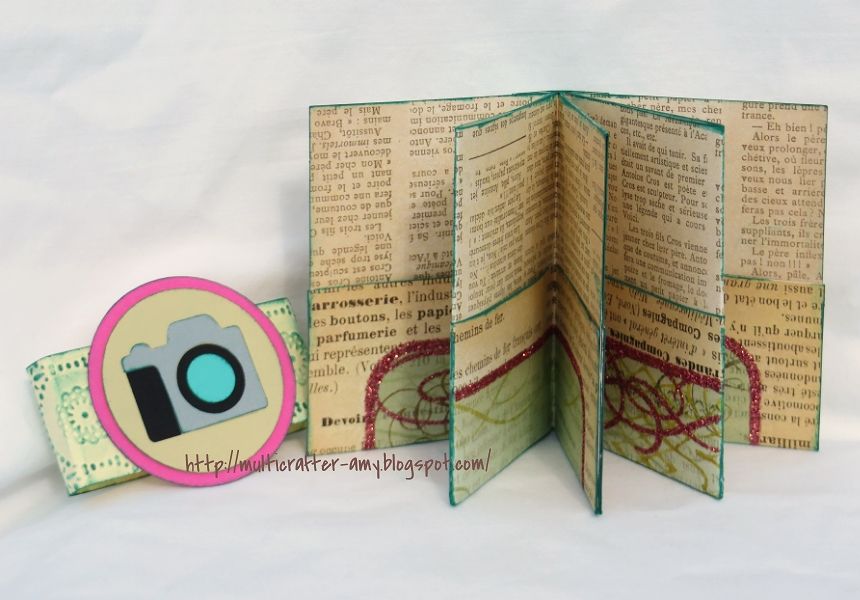
I made a mini as my challenge project. It is mainly made with one sheet of 12 x 12 paper and a small piece to bind it that I just dug out of my scraps. It really is simple.
I love that it has pockets.
The great thing about this mini is you don't have to use it as a mini. You could use it to hold all your store savings/member cards. Also you could just use it to safely store photos you plan to hand out. I can even see making theses as gift as brag books to new moms or grandmas. Maybe you can even think of a new use.
Here are a few video links to make the Mini.They are both good and show two different ways to bind the mini. I like the band in the one to hold the book shut.As you can tell I used that and embossed mine with a Anna Griffin folder
https://www.youtube.com/watch?v=kYHiSLU7iA4
https://www.youtube.com/watch?v=7uGGdpT_vG0
Please scroll all the way to the bottom of this page to find the link up tool.
Here is a list of all the other bloggers that posting challenges on their blogs.
I made a mini as my challenge project. It is mainly made with one sheet of 12 x 12 paper and a small piece to bind it that I just dug out of my scraps. It really is simple.
I love that it has pockets.
The great thing about this mini is you don't have to use it as a mini. You could use it to hold all your store savings/member cards. Also you could just use it to safely store photos you plan to hand out. I can even see making theses as gift as brag books to new moms or grandmas. Maybe you can even think of a new use.
Here are a few video links to make the Mini.They are both good and show two different ways to bind the mini. I like the band in the one to hold the book shut.As you can tell I used that and embossed mine with a Anna Griffin folder
https://www.youtube.com/watch?v=kYHiSLU7iA4
https://www.youtube.com/watch?v=7uGGdpT_vG0
Please scroll all the way to the bottom of this page to find the link up tool.
Here is a list of all the other bloggers that posting challenges on their blogs.
Col's Creative Corner. - www.scrappycol.blogspot.com
The Singing Shell - www.singingshell.blogspot.com
Forever Inspired - http://cowgirl1hh.wordpress. com/
Wednesday, April 30, 2014
Baby Card Time
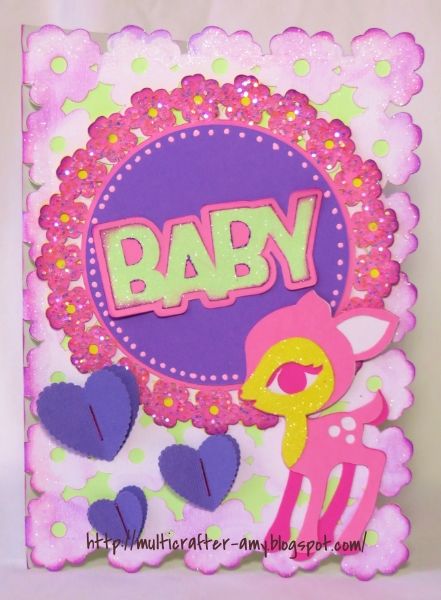
Hi everyone. Long time no post! I plan to get back to posting a bunch of stuff !!!So today I have a card for you. Right now I am working on my card stash so I will have some ready when needed. It is no fun rushing a design and then making something you are not completely happy with. So in my spare time I will be building up my stash of cards. Stay tuned because I plan to share them here!
Oh and would love for you to follow my blog .
I have some special posts planned for this weekend so stop by again!
Cartridges used were:
Anna Griffin Summer Soirees - card base & doily
Cricut Craft Room Basics - hearts& circle
Cindy Lou - deer
Cricut Font and Basic shapes - word "BABY"
Oh and would love for you to follow my blog .
I have some special posts planned for this weekend so stop by again!
Cartridges used were:
Anna Griffin Summer Soirees - card base & doily
Cricut Craft Room Basics - hearts& circle
Cindy Lou - deer
Cricut Font and Basic shapes - word "BABY"
Friday, May 31, 2013
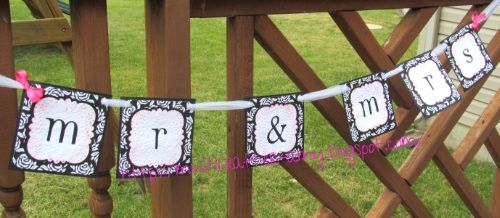
Mr. & Mrs. Banner
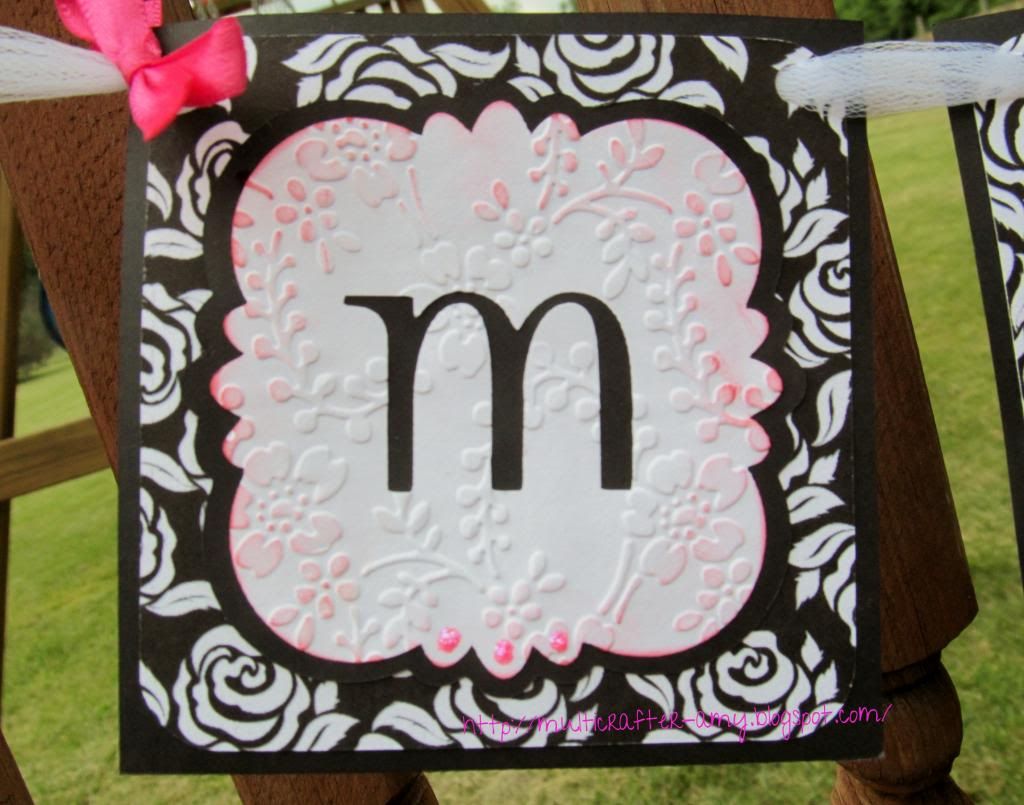
My mom is a maid of honor in a wedding coming up and her friend asked if I would make a banner to hang on their table. She saw the one I made for my little sisters wedding. she basically just told me what colors and let me go with it. I like it when people leave the design up to me. I have never posted that one. Maybe I will soon. lol I hope you all enjoy it. These were just a few quick pictures I took before mom took them to the bride to be.
cartridges used: Lacy labels, Teresa Collins Black and White Imagine cartridge for the printed paper. I also used one of the new Ann Griffin Cuttlebug folders.
Sunday, May 12, 2013
NSD Color Challenge Entry
Go check out her blog!
http://www.scrappinwiththebug.blogspot.com/
Cricutville Online National Scrapbook day(s)...Come color with me...
Here is my entry:
Wednesday, July 25, 2012
2nd Journal made with Out of Character
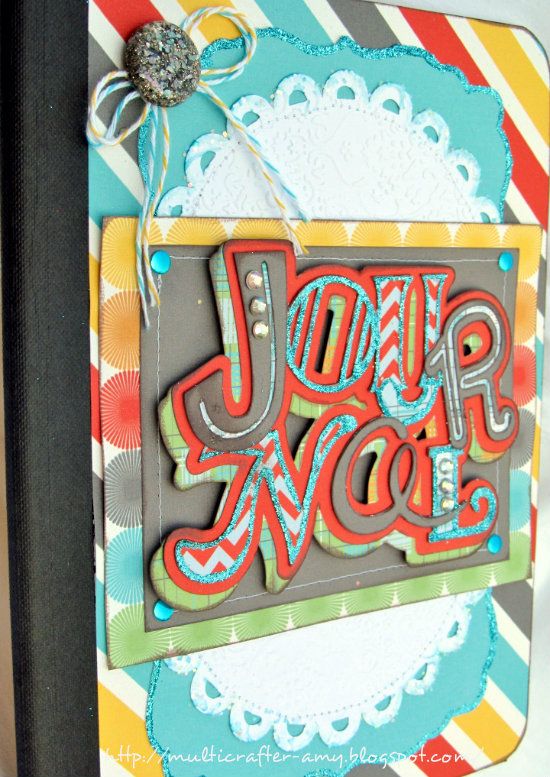
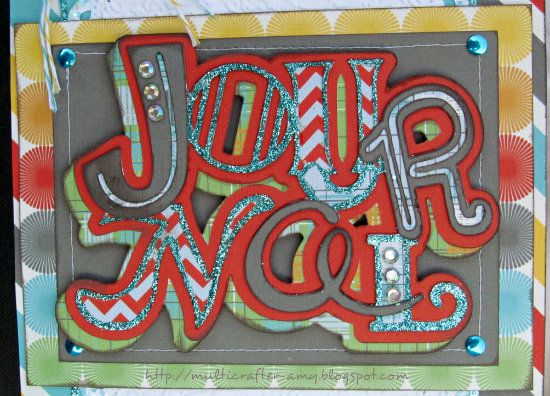
Here is the second journal I made. You can see more tips on how I made this in my post from yesterday. I did make this one a little different. I still used the Imagines Word of Mouth cartridge for all the matching paper. You can see it's the same Journal word cut I used on my last Journal. Though it is the same cut it looks totally different with the my paper color choices and where I used my glitter this time. I also added gems to some of the letters.
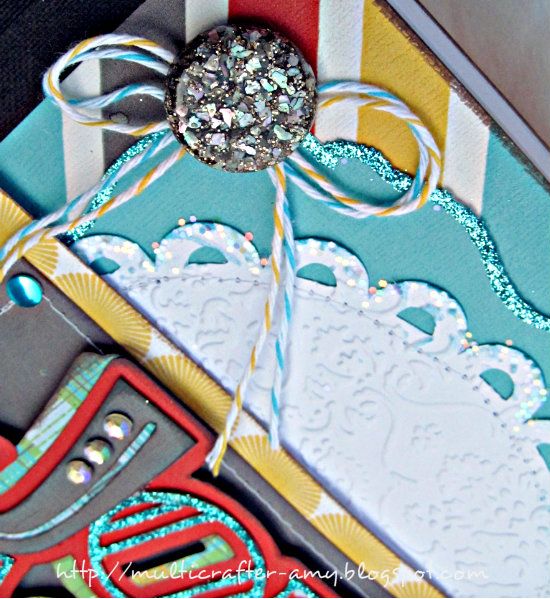
I stitched on the mat and on the doily that I ran through one of my embossing folders.
I will try to find the name of it and do an edit.
Here I added a button I found at an estate sale. I bought a bunch of vintage buttons. It looks like it has little chunks of Mica in it that match both the blue and grey on the papers. I cut a hole in the cover to stick the button in and attached it with a 3D zots. This adhesive holds things on tight.
I inked all the edges with a grey ink.
Out of Character =
*Journal at 3.5inches
Easter 2010 =
doily cut at 5 1/2 and then I cut it in half , ran it through my cuttlebug, inked the edges with blue and sugared the edges with iridescent glitter.
I used that shape
that come with the Imagine again,which is similar to the a cut you can find
free on the Cricut Craft Room Basics digital cartridge available through
Cricut Craft Room. It was cut at 4.5 inches and then I cut it in half.
The matting behind the word journal is just cut by hand.
I am going to be posting a card real soon. I hope to have it ready to post by tomorrow. Please leave a comment, I like to hear what you like!
Amy
Tuesday, July 24, 2012
My Exercise Journal
I like to keep track of how much I exercise and what I eat. It keeps me on track. There is something about writing it down that keeps me accountable. For the last two months I have been exercising and changing my diet. I have been writing it all down on a little note book but I decided I wanted a nicer notebook to keep track of my success. So when I read about the Circle magazine challenge this month, I knew exactly what I wanted to make, Journals!!!
Here are the rules:
Challenge Rules:
Please use at least 1 full Out of Character Image Cut including layers in your project. Create any kind of project you would like and up load a working link or picture of your project to the blog under the Magazine Challenge tab. Entry deadline is July 29th. If you use Cricut Craft Room design tool, save your file so if you win, we can share it with the Circle members! The winner of this challenge will receive $200.00 credit to Cricut.com and you can enter as many times as you want! Rev up your machines and get crafty!!
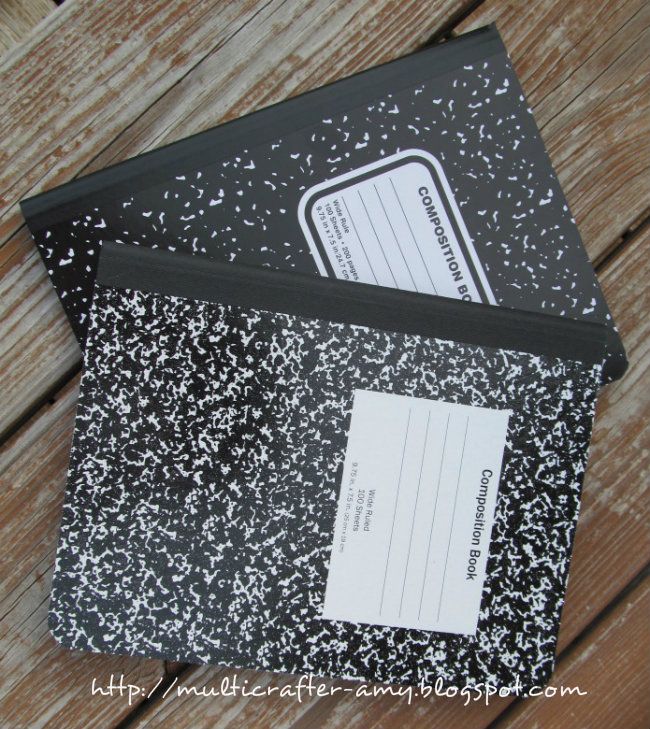
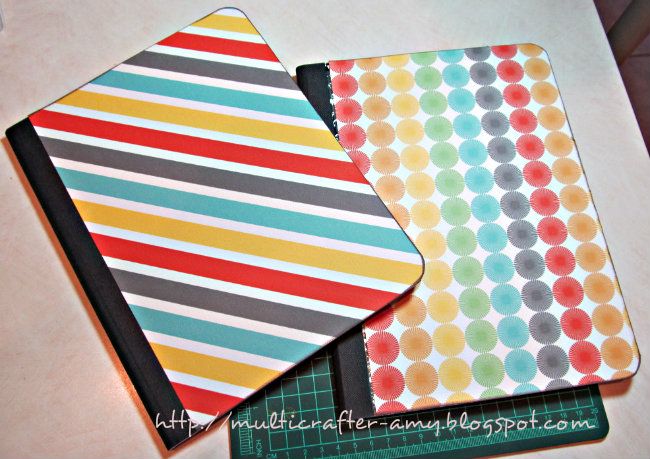
First you will need to pick up some Composition Notebooks. These are easy and cheap to find right now due to school supplies being stocked in the stores. I found some for 50 cents. Then I grabbed some paper. I decided to print all mine from the Cricut Imagine cartridge Word Of Mouth. Then I glued it to the front of the book with some spray adhesive glue. I also put a solid sheet of paper on the back. The best way to cut the paper is after you adhere it. I placed it on a cutting mat a cut it with an exacto knife.
Here are the rules:
Challenge Rules:
Please use at least 1 full Out of Character Image Cut including layers in your project. Create any kind of project you would like and up load a working link or picture of your project to the blog under the Magazine Challenge tab. Entry deadline is July 29th. If you use Cricut Craft Room design tool, save your file so if you win, we can share it with the Circle members! The winner of this challenge will receive $200.00 credit to Cricut.com and you can enter as many times as you want! Rev up your machines and get crafty!!
Here is the first Journal:
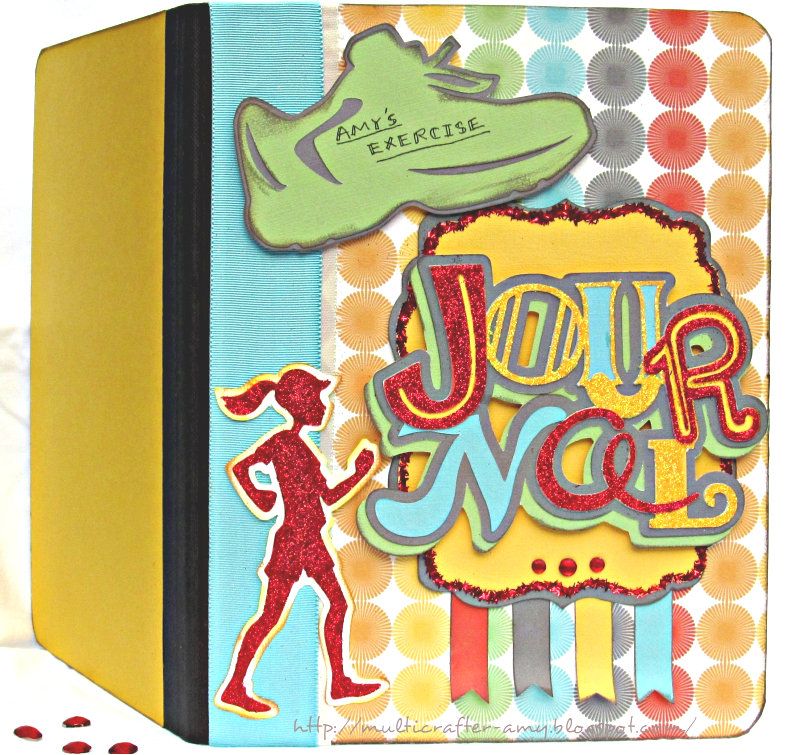
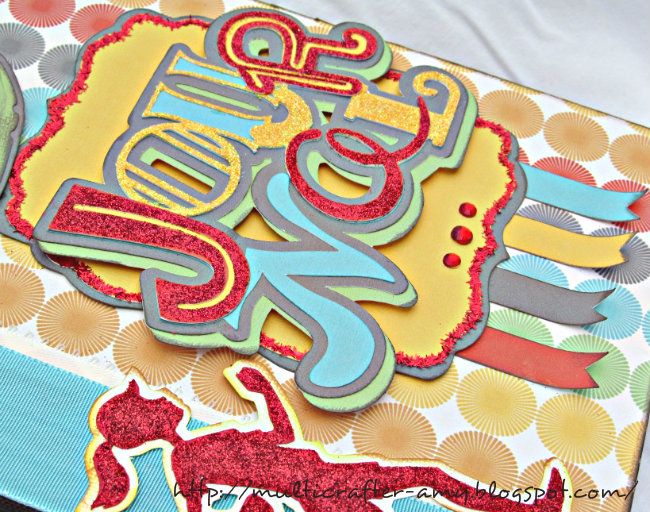
I used yellow and red glitter for the word journal.
Below are some tips on how I put it together.
First you will need to pick up some Composition Notebooks. These are easy and cheap to find right now due to school supplies being stocked in the stores. I found some for 50 cents. Then I grabbed some paper. I decided to print all mine from the Cricut Imagine cartridge Word Of Mouth. Then I glued it to the front of the book with some spray adhesive glue. I also put a solid sheet of paper on the back. The best way to cut the paper is after you adhere it. I placed it on a cutting mat a cut it with an exacto knife.
| Just open up the book and run the blade along the edge. |
Here are the books with the paper adhered.
I then inked all the edges with a black / brown ink pad. Next I assembled all the cuts.
You can see where I pop dotted the word Journal.
I also inked all the layers before I put them together. The glittered letters were all done before I pieced the image together also.I cut all the flags at the bottom by hand. They help balance out the cover. I used 3 red rhinestones at the bottom of the matted word journal to add some more sparkle.
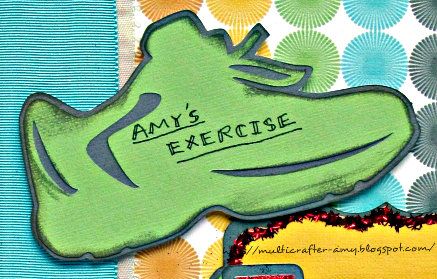
I like to use over sized kind of plain cuts to write info on. This was perfect. I inked all the edges with grey/brown ink.
I also used pop dots on the shoe.
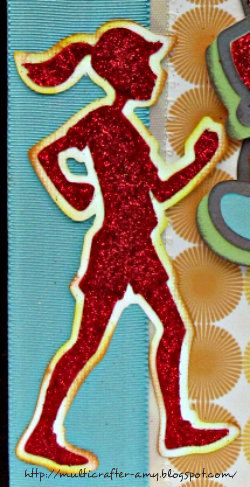
I inked the edges of the shadow of the runner with yellow and red ink pads before I added the red glittered runner.
Here are all the Cricut cartridges and sizes of the images cut.
Out of Character =
*Journal at 3.5inches
Pink Journey =
*lady running at 4.5 inches
*Shoe at 2.5 inches
The shape used as a mat under the word journal is cut twice from shapes that come with the Imagine which is similar to the a cut you can find free on the Cricut Craft Room Basics digital cartridge available through Cricut Craft Room. It was cut at 4.5 inches.
I cut all the flags at the bottom by hand and inked them.
I also added a piece of blue and a piece of white ribbon.
I hope that someday my exercising will become a regular good habit but until then I have a fancy journal to keep me in check. Stay tuned folks I will be posting another journal real soon!
Amy
I cut all the flags at the bottom by hand and inked them.
I also added a piece of blue and a piece of white ribbon.
I hope that someday my exercising will become a regular good habit but until then I have a fancy journal to keep me in check. Stay tuned folks I will be posting another journal real soon!
Amy
Thursday, May 24, 2012
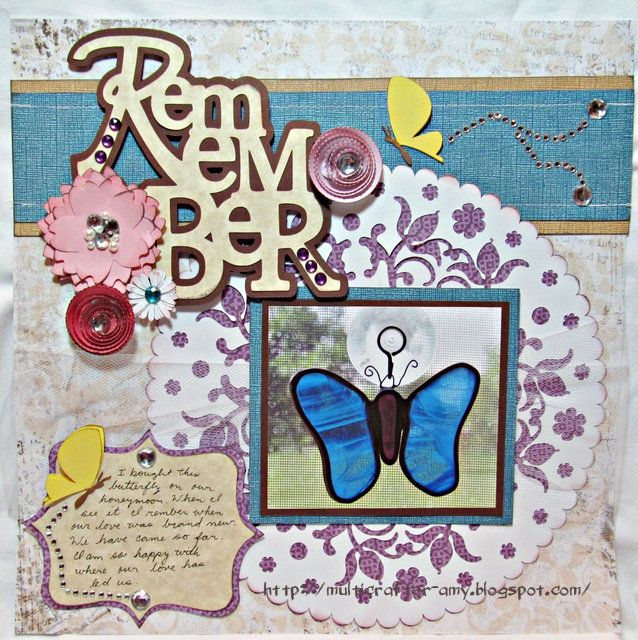
First Circle Challenge
I added some tulle under the picture.
Here is the Journaling. I cut the butterflys twice and just glued the body so it would give it a 3D effect.
Cricut Cuts used:
Mothers Day 2010 - Doily
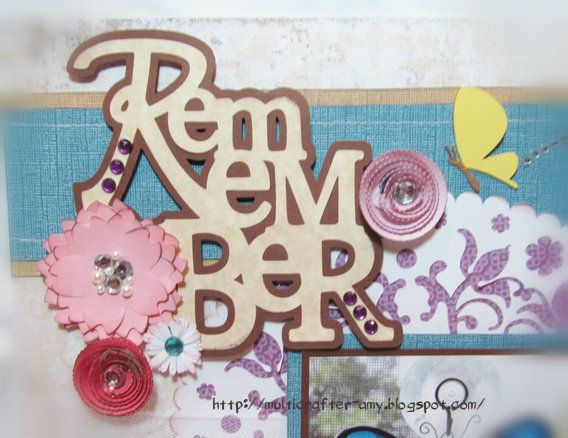
Gypsy Font - Remember, big pink flower, tiny daisy like flower, Journal box (tag shadow), and butterflys
Flower Shoppe - circle flowers
Saturday, April 28, 2012
We Have A Winner For The Twine!
I asked my husband to draw a number. He drew #3. Then he said what did they win. I said twine of course! lol
You have a week to contact me. Please email me your address so I can get this out to you!
Thanks,
Amy
Congratulations!

PinkEApr 24, 2012 04:00 PM
Hi
I'm your newest follower! I love the twine!! Oh, and you did an
awesome job on your header! Come and follow me if you get a chance!You have a week to contact me. Please email me your address so I can get this out to you!
Thanks,
Amy
Monday, April 23, 2012
My Blog Has A New Look and A Small Giveaway!
I am totally loving what I can do with my new My Memories Suite V3 digital Scrapbooking software. I created the header for my blog totally from scratch with this Digital Scrapbooking program. For me there is nothing better than making something your own. I like the fact that I was able to add a picture to it. You can find out how to make a blog header to by watching this tutorial. I did not need to download the free Photoscape program as suggested in the video because I just designed the header with the basics from the program. Then I decided to make my own button too. I found info on how to do that HERE. If you are interested in the My Memories Suite V3 software please note there is a coupon code on my sidebar that will save you $10.00.
To celebrate the new look of my blog I am giving away a tag with some twine! It will be just enough to give you a taste of twine if you don't have any yet or if you just would like a little more. There is about 3 to 5 yards of each of the four colors shown.
To be entered into the drawing.
1. Become a follower.
2. Leave a comment telling me which type of cards you make the most of or send out?
I will announce a winner on Saturday, April 28th!
To celebrate the new look of my blog I am giving away a tag with some twine! It will be just enough to give you a taste of twine if you don't have any yet or if you just would like a little more. There is about 3 to 5 yards of each of the four colors shown.
To be entered into the drawing.
1. Become a follower.
2. Leave a comment telling me which type of cards you make the most of or send out?
I will announce a winner on Saturday, April 28th!
Saturday, April 7, 2012
My New Jewelry Tree
Today I want to share with you a jewelry tree I found at my local craft store. I really liked this tree just the way it was.... but I needed it to match my bedroom colors. My bedroom colors are brown and blue. So I decided to paint my tree with some brown, blue, and gold acrylic paints. I needed this tree to look like it belongs on my dresser. Also if you look at these pictures you may notice a big difference in the quality of my pictures. On the before picture I used my 6 year old Kodak camera that I can no longer buy the lithium batteries for They quit making them. Also I did not take the time to get a better shot without a shadow. So I bought a new camera. I am so glad I did because this camera has a better zoom and way better mega pixels. So the pictures of my family and projects will be so much clearer and I will be able crop my pictures without losing quality. Also my new camera uses AA batteries which are easy to find an replace. My new camera is slim and will be easier to take along places. It is still a point and shoot camera. I may invest in a more expensive fancier camera later but this one will do for now. My next purchase will be a new video camera so I can do videos for my blog and better videos of my family.

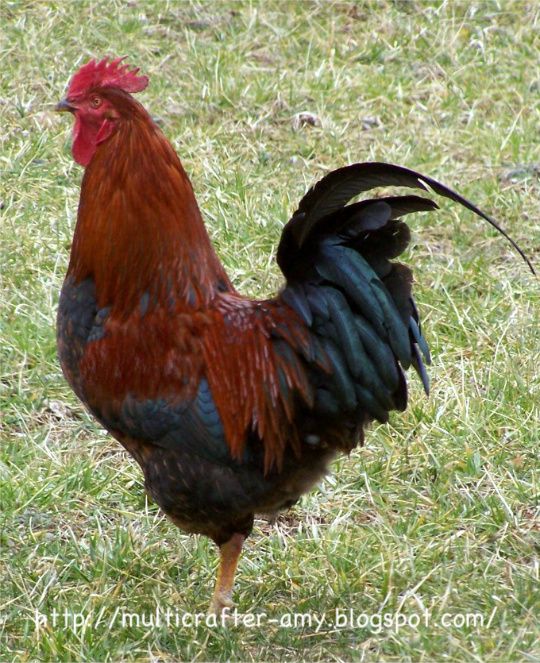
Ok I just had to add this picture of our neighbors rooster. He sure is pretty but can be annoying. I took this picture a few weeks ago. I was taking care of a sick 4 and 6 year old. So I was very busy and was so tired. I had finally taken care of all their needs. I sat down to take a break, the TV was off and the house was quite with two sleeping boys. All of a sudden I hear this dude crowing! It is normal to hear them crow throughout the day, but this was loud. I went to the front door and there he was to greet me just a few feet away. I just laughed and grabbed my camera and he posed. I then told him to leave. He was not interested in leaving, he and a few hens are always visiting us. So I grabbed a glass of water to scare him away. Don't worry, I didn't hit him with it. I threw it on the ground next to him. This picture makes me want to pull out my Country Life cartridge and make a card.
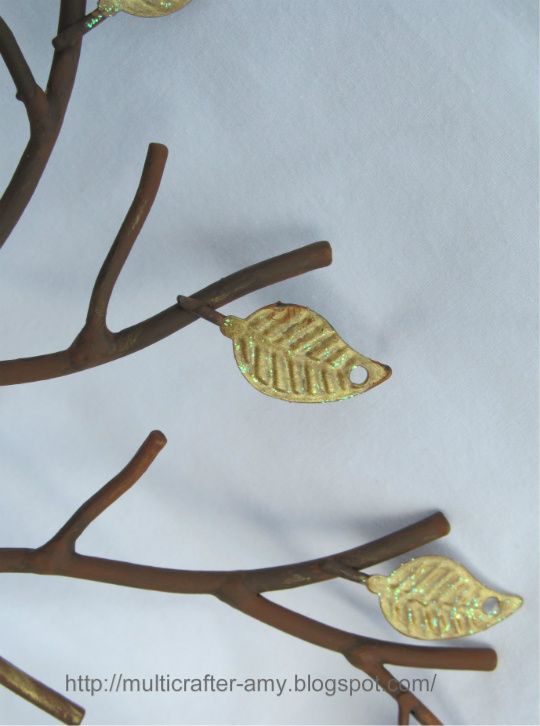
I added some iridescent glitter glue to the leaves to give it a girly touch.
Tuesday, April 3, 2012
Winner of the MyMemories Suite Software
Today is the day I announce the winner!!!
I numbered some paper and placed them in a cup and had my 10 year old son draw a random number.
Congratulations!
I will send you an email on how to claim your prize!
Now if you were not the winner but would like to purchase My Memories Suite v3 Digital Scrapbooking Software, don't forget to use the coupon code below. You will save $10.00 on the software when you use it.
I numbered some paper and placed them in a cup and had my 10 year old son draw a random number.
Congratulations!
I am now a follower..... So hard to pick but I really like the "Spring Ring" and I also liked the MyMemories page and posted that you sent me on FB.
I will send you an email on how to claim your prize!
Now if you were not the winner but would like to purchase My Memories Suite v3 Digital Scrapbooking Software, don't forget to use the coupon code below. You will save $10.00 on the software when you use it.
STMMMS70143
Also remember to sign up for the newsletter to receive news about freebies and sales!
Thursday, March 29, 2012
JINGER ADAMS DESIGN TEAM CALL - A THANK YOU CARD WITH SOME SPARKLE
Hi Everyone!
Jinger Adams is having a design team call for a her new line of Scrapbooking/Card Products. I am excited to see what Jinger comes out with and I want to be a part of the excitement! So I am trying out.
If you would like to try out for the the team also you can find all the information HERE. The deadline to enter is March 31st, so you need to hurry! I was busy finishing up some submissions for Cricut Magazine so I could not complete this till now.
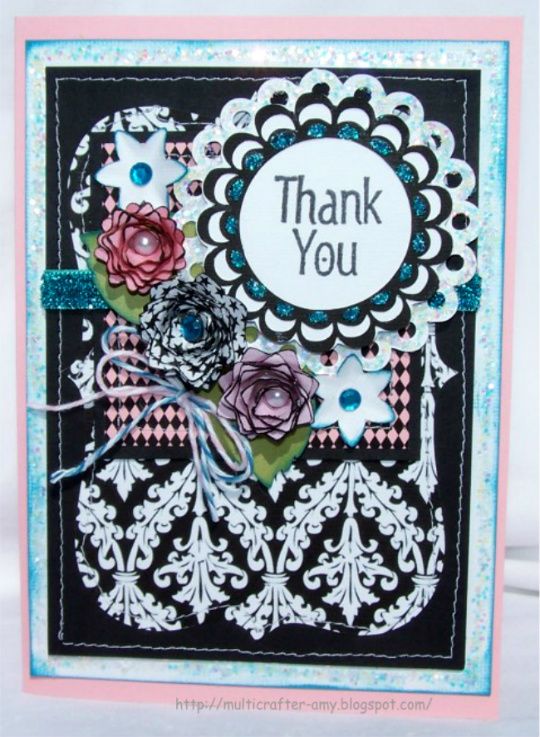
The card I am posting today was fun to make. I broke out the glitter again. I had so much fun using glitter for the card I made for the Typecast Creative Challenge that I decided to use some again. My inspiration for this project started with a new package of Inkadinkado Thank You Stamps and a new roll of sparkly ribbon. I had to find a way to use them. I decided The black and white papers from the Black and White Cricut Imagine cartridge by Teresa Collins was a good choice.
The card is an A7 size card. I matted the card with white cardstock that I inked it with a turquoise blue ink pad and glued an edge of iridescent glitter all around. I then matted the card with a piece of black cardstock and attached a shape that comes on your Imagine and filled it with a print from the Black and White cartridge. I then stitched the two pieces of paper . Then I cut a piece of pink paper that was printed on the Imagine with the Black and White cartridge and matted it with a black piece of paper and stitched them together.
The flowers were all made from the Flower Shoppe cartridge and filled with colors from my Imagine. I inked the edges of the flowers with black ink before I rolled them. Then I attached some rhinestone and pearls to the center of the flowers.
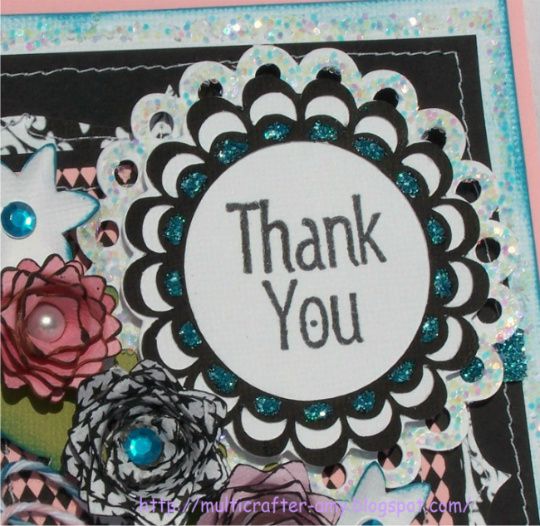
The Thank You stamp just fitted perfectly in the center. I added some Broken China Ranger stickles to the scallop to make it shine. On the scallop shape on the back I edged with more iridescent glitter. I made a bow from a few pieces of Trendy Twine and Twinery Twine.
Card size is A7 (5x7), cut from pink cardstock.
All the prints were from the Black and White - Teresa Collins Cricut Imagine cartridge
Elegant Edges
3" scallop1 on pg. 23
Lovely Floral
2.5" Doily2 and Doily2 shift (4th cut in pamphlet)
Flower Shoppe
3" exoctic 1 of star print
2.5" exoctic 1 light pink
2" exoctic 1 darker print
1" mum2 white cardstock inked with turquoise blue
2" fun5 9leaf) leaves inked with turquoise blue
Mat sizes:
(listed order of what you place on the card first)
White cardstock - 4 .75" x 6 .5 "
black cardstock - 4.25" x 6 "
Imagine preloaded shape @ 4" filled with print
black cardstock - 3.25" x 3.25"
pink cardstock printed on Imagine - 3" x 3"
Good Luck everyone!
Tuesday, March 13, 2012
My Memories Suite Review and a Giveaway & Discount Code
Hi everyone! I received an email a few months ago about doing a review and a giveaway for the MyMemories Suites 3V Scrapbooking Software and I am really excited with how easy it is to use and how the software functions. I do love to use paper and all that but I can see so many great possibilities for this software. I had so much fun playing with this software and it would be great for traditional scrapbooking. You can use it to do sketches for your scrapbook pages. It would be great to make several of the same scrapbooks for your family as gifts. I could see a new bride making memory books of her special day for her parents, in-laws, and Grandparents. She would only have to make the book once and just print as many copies as she wants.
I decided to make two different pages with the same pictures to show you how different you can make your layouts. Also all the pages and the elements came with the software. There are so many options for embellishments, you can keep yourself very busy. The good thing is you never run out of the embellishments or have to store them. I made these pages in a matter of minutes. It is an easy program to use.

These pages are of the guinea pigs we babysat during Christmas. They were so cute!
They have a great collection of digital scrapbook kits available at great prices and free ones. Also for my readers, My Memories Suite has offered to give you all a discount code for $10 off the MyMemories Suite Digital scrapbooking Software plus a $10 coupon for the MyMemories Suite store.
Just copy the coupon code below to take advantage of this discount:

You will want to check out their Facebook page too. They announce freebies and deals there!
Here are the ways you can enter to win a free copy of MyMemories Suites 3V Scrapbooking Software:
You get an entry for each task, please post each task in the comments on this post. You are not required to follow my blog but you will get another entry if you do.
1. Become a follower of my blog.
2. Go to digital scrapbook kits and tell me which kit is you favorite.
3. Like MyMemories on Facebook. Post on their wall that Multi Crafter Amy sent you and come back here and let me know you did.
Also here is a link to the MyMemories Tutorial. You can go there to watch a video on how to use the program. I will pick a random winner in two weeks.
Please leave a way for me to contact you. :)
I decided to make two different pages with the same pictures to show you how different you can make your layouts. Also all the pages and the elements came with the software. There are so many options for embellishments, you can keep yourself very busy. The good thing is you never run out of the embellishments or have to store them. I made these pages in a matter of minutes. It is an easy program to use.

These pages are of the guinea pigs we babysat during Christmas. They were so cute!They have a great collection of digital scrapbook kits available at great prices and free ones. Also for my readers, My Memories Suite has offered to give you all a discount code for $10 off the MyMemories Suite Digital scrapbooking Software plus a $10 coupon for the MyMemories Suite store.
Just copy the coupon code below to take advantage of this discount:
STMMMS70143
By using this code at MyMemories.com, you can get $10 off My Memories Suite (you get it for $29.97 instead of $39.97) AND you also get a $10 gift certificate to use in their online store!You will want to check out their Facebook page too. They announce freebies and deals there!
Here are the ways you can enter to win a free copy of MyMemories Suites 3V Scrapbooking Software:
You get an entry for each task, please post each task in the comments on this post. You are not required to follow my blog but you will get another entry if you do.
1. Become a follower of my blog.
2. Go to digital scrapbook kits and tell me which kit is you favorite.
3. Like MyMemories on Facebook. Post on their wall that Multi Crafter Amy sent you and come back here and let me know you did.
Also here is a link to the MyMemories Tutorial. You can go there to watch a video on how to use the program. I will pick a random winner in two weeks.
Please leave a way for me to contact you. :)
Thursday, March 8, 2012
Curt Jensen's BABY CARTRIDGE CHALLENGE
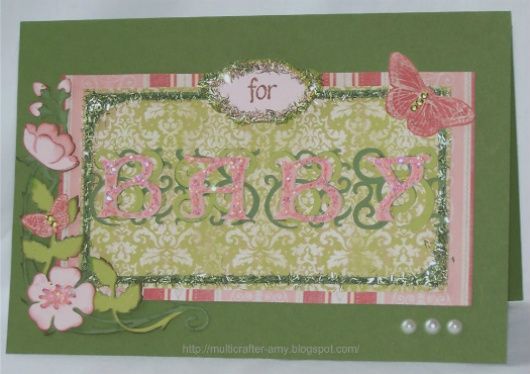
I decided to make a card for Curt Jensen's Baby Cartridges Challenge. He is a designer for ProvoCraft. Check out his Blog, Typecast Creative. Check out the contest HERE. The only problem is I don't have any of his Baby Cartridges (Word Collage (baby sign and embossing folder) and Stork's Delivery (Sugar & Spice font). Well that actually made me want to try this challenge. lol It's a bigger challenge and I love that. I do have Art Nouveau , Heirloom, and Fathers Day. I decided to go with Art Nouveau and Heirloom. I flipped through my booklets and put on my thinking cap. Below you will see what I came up with. I actually even have an idea of how to use the Fathers Day cartridge but I decided to save that idea for later. I jotted that one down in my sketch book. I wanted to showcase Curts cartridge art like suggested, so I limited all my cuts to his cartridge designs. You really can find the shapes you need in a cartridge if you look hard enough. (This time anyways.) I do have my go to cartridges for tags, labels, squares and such. I decided to make a Girl baby card. I love an excuse to make something Girly. I have three boys so to make something sparkly and pink is a treat for me.


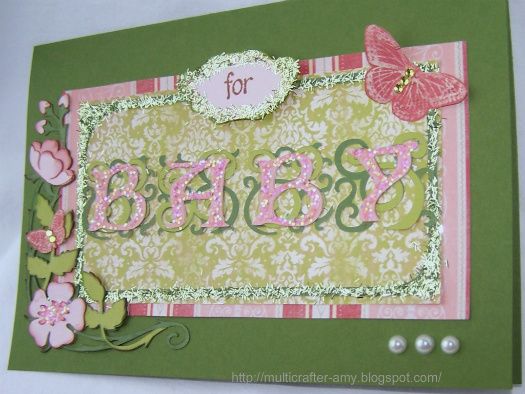
I turned the card here so you can see how it sparkles when you look at it from a different angle.
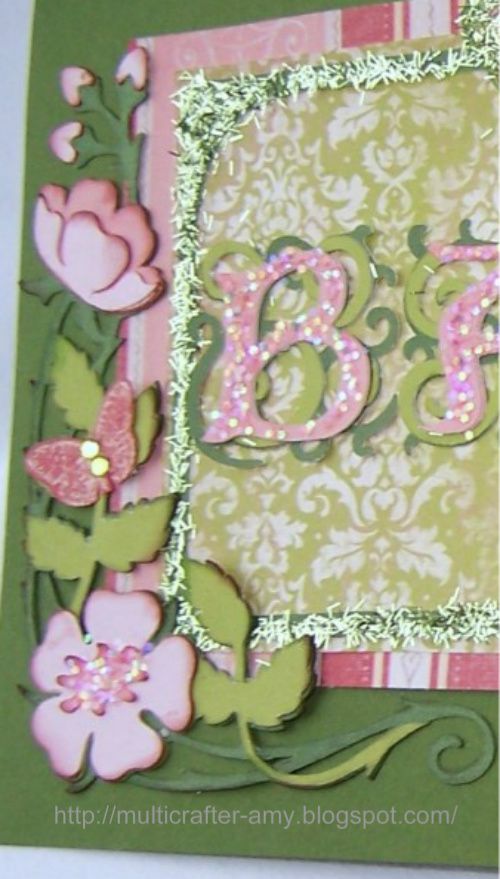
I used iridescent glitter for the letters (BABY)


This tag was also made with the Art Nouveau Cartridge. I inked the edges with green and then I glittered it. I pop dotted it on there.

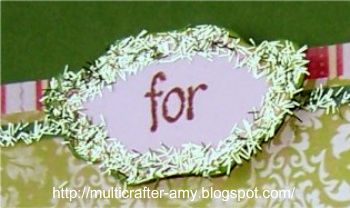
I used tinsel glitter for the green frame.
I think it gives the card a mossy look .
I turned the card here so you can see how it sparkles when you look at it from a different angle.
I used iridescent glitter for the letters (BABY)
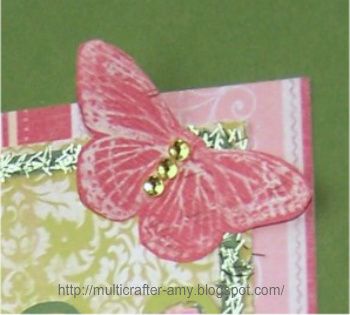
I cut out this butterfly from some of the paper found the Heirloom cartridge and placed a few rhinestones in the middle.

This tag was also made with the Art Nouveau Cartridge. I inked the edges with green and then I glittered it. I pop dotted it on there.
These were the cuts for my card:
All the cuts were made from Art Nouveau Cartridge and the printed paper is from the Heirloom cartridge. The card base is the only paper I did not run trough my Imagine.
I filled in the letters, tag, Square layers, frame and flowers with colors and prints found on Heirloom. I just printed a sheet of the butterfly paper out and cut out some butterflies by hand to get the butterflies accents and added some rhinestones. I inked all the leaves and flowers with a light brown ink pad.
- card was cut from a green cardstock I had on hand.
It measures 7.75 x 5.25. Its a A8 size card.
- cut at 4" filled with dark green
-cut Layer 1 at 4" (relative size) filled with light green
-cut Layer 1 shift at 4" (relative size) filled with dark pink
-cut Layer 2 at 4" (relative size) filled with light pink
-cut the letters (BABY) from Font 2 at 1" and fill with dark pink
-cut Font2 Layer for (BABY) at 1" (relative size) filled with dark green
-cut the Font2 Layer shift for (BABY) at 1" (relative size) filled with light green
For the Background:
- cut pg. 64 Font 2 shift at 3" true size and 2.5" rel filled with dark green (this is your frame)
- cut pg. 64 Font 2 Layer at 3.1 true and 2.5" rel filled with light green damask print
-cut pg. 64 Font 2 Layer at 3.5" true filled with the pink stripe paper
The for Label:
cut 1 pg. 66 Font 2 Layer shift at 1" true
(Flip it upside down.)
The Inside:
cut pg. 64 Font 2 Layer at 2.5" true filled with light green damask print
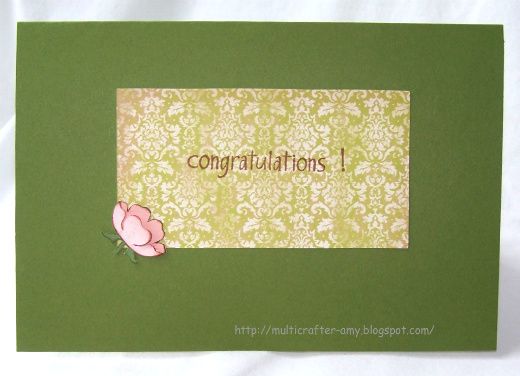
The flower on the inside was from a duplicate cut of the flower you see on the front of the card. Part of it did not turn out the first time I cut it.
I decided to add this good part to the inside of the card. lol
Stamps Used:
I used stamps from The Paper Studios / Stampabilities set called Everyday Expressions.
I also added three little pearls to the bottom right hand corner. It just needed something there.
You should be able to recreate this card with these instructions if you want.
Wish me luck!
UPDATE: My card won!!!
All the cuts were made from Art Nouveau Cartridge and the printed paper is from the Heirloom cartridge. The card base is the only paper I did not run trough my Imagine.
I filled in the letters, tag, Square layers, frame and flowers with colors and prints found on Heirloom. I just printed a sheet of the butterfly paper out and cut out some butterflies by hand to get the butterflies accents and added some rhinestones. I inked all the leaves and flowers with a light brown ink pad.
- card was cut from a green cardstock I had on hand.
It measures 7.75 x 5.25. Its a A8 size card.
- cut
-cut
-cut
-cut
-cut the letters (BABY) from Font 2 at 1" and fill with dark pink
-cut Font2 Layer for (BABY) at 1" (relative size) filled with dark green
-cut the Font2 Layer shift for (BABY) at 1" (relative size) filled with light green
For the Background:
- cut pg. 64 Font 2 shift at 3" true size and 2.5" rel filled with dark green (this is your frame)
- cut pg. 64 Font 2 Layer at 3.1 true and 2.5" rel filled with light green damask print
-cut pg. 64 Font 2 Layer at 3.5" true filled with the pink stripe paper
The for Label:
cut 1 pg. 66 Font 2 Layer shift at 1" true
(Flip it upside down.)
The Inside:
cut pg. 64 Font 2 Layer at 2.5" true filled with light green damask print
The flower on the inside was from a duplicate cut of the flower you see on the front of the card. Part of it did not turn out the first time I cut it.
I decided to add this good part to the inside of the card. lol
Stamps Used:
I used stamps from The Paper Studios / Stampabilities set called Everyday Expressions.
I also added three little pearls to the bottom right hand corner. It just needed something there.
You should be able to recreate this card with these instructions if you want.
Wish me luck!
UPDATE: My card won!!!
Subscribe to:
Posts (Atom)