I am totally loving what I can do with my new My Memories Suite V3 digital Scrapbooking software. I created the header for my blog totally from scratch with this Digital Scrapbooking program. For me there is nothing better than making something your own. I like the fact that I was able to add a picture to it. You can find out how to make a blog header to by watching this tutorial. I did not need to download the free Photoscape program as suggested in the video because I just designed the header with the basics from the program. Then I decided to make my own button too. I found info on how to do that HERE. If you are interested in the My Memories Suite V3 software please note there is a coupon code on my sidebar that will save you $10.00.
To celebrate the new look of my blog I am giving away a tag with some twine! It will be just enough to give you a taste of twine if you don't have any yet or if you just would like a little more. There is about 3 to 5 yards of each of the four colors shown.
To be entered into the drawing.
1. Become a follower.
2. Leave a comment telling me which type of cards you make the most of or send out?
I will announce a winner on Saturday, April 28th!
Monday, April 23, 2012
Saturday, April 7, 2012
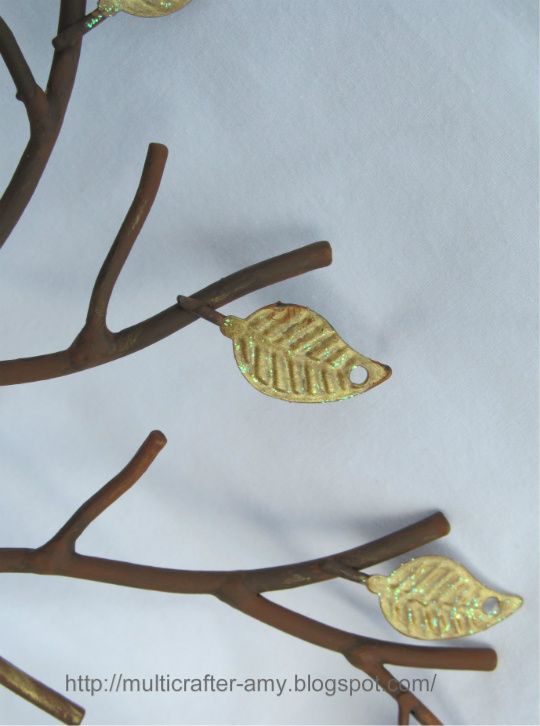
My New Jewelry Tree
Today I want to share with you a jewelry tree I found at my local craft store. I really liked this tree just the way it was.... but I needed it to match my bedroom colors. My bedroom colors are brown and blue. So I decided to paint my tree with some brown, blue, and gold acrylic paints. I needed this tree to look like it belongs on my dresser. Also if you look at these pictures you may notice a big difference in the quality of my pictures. On the before picture I used my 6 year old Kodak camera that I can no longer buy the lithium batteries for They quit making them. Also I did not take the time to get a better shot without a shadow. So I bought a new camera. I am so glad I did because this camera has a better zoom and way better mega pixels. So the pictures of my family and projects will be so much clearer and I will be able crop my pictures without losing quality. Also my new camera uses AA batteries which are easy to find an replace. My new camera is slim and will be easier to take along places. It is still a point and shoot camera. I may invest in a more expensive fancier camera later but this one will do for now. My next purchase will be a new video camera so I can do videos for my blog and better videos of my family.

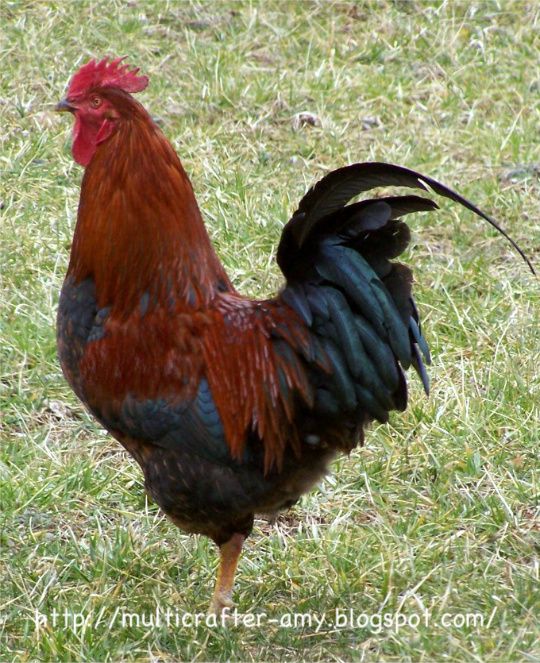
Ok I just had to add this picture of our neighbors rooster. He sure is pretty but can be annoying. I took this picture a few weeks ago. I was taking care of a sick 4 and 6 year old. So I was very busy and was so tired. I had finally taken care of all their needs. I sat down to take a break, the TV was off and the house was quite with two sleeping boys. All of a sudden I hear this dude crowing! It is normal to hear them crow throughout the day, but this was loud. I went to the front door and there he was to greet me just a few feet away. I just laughed and grabbed my camera and he posed. I then told him to leave. He was not interested in leaving, he and a few hens are always visiting us. So I grabbed a glass of water to scare him away. Don't worry, I didn't hit him with it. I threw it on the ground next to him. This picture makes me want to pull out my Country Life cartridge and make a card.
I added some iridescent glitter glue to the leaves to give it a girly touch.
Tuesday, April 3, 2012
Winner of the MyMemories Suite Software
Today is the day I announce the winner!!!
I numbered some paper and placed them in a cup and had my 10 year old son draw a random number.
Congratulations!
I will send you an email on how to claim your prize!
Now if you were not the winner but would like to purchase My Memories Suite v3 Digital Scrapbooking Software, don't forget to use the coupon code below. You will save $10.00 on the software when you use it.
I numbered some paper and placed them in a cup and had my 10 year old son draw a random number.
Congratulations!
#10
skrapr22Mar 29, 2012 10:18 PM
I am now a follower..... So hard to pick but I really like the "Spring Ring" and I also liked the MyMemories page and posted that you sent me on FB.
I will send you an email on how to claim your prize!
Now if you were not the winner but would like to purchase My Memories Suite v3 Digital Scrapbooking Software, don't forget to use the coupon code below. You will save $10.00 on the software when you use it.
STMMMS70143
Also remember to sign up for the newsletter to receive news about freebies and sales!
Thursday, March 29, 2012
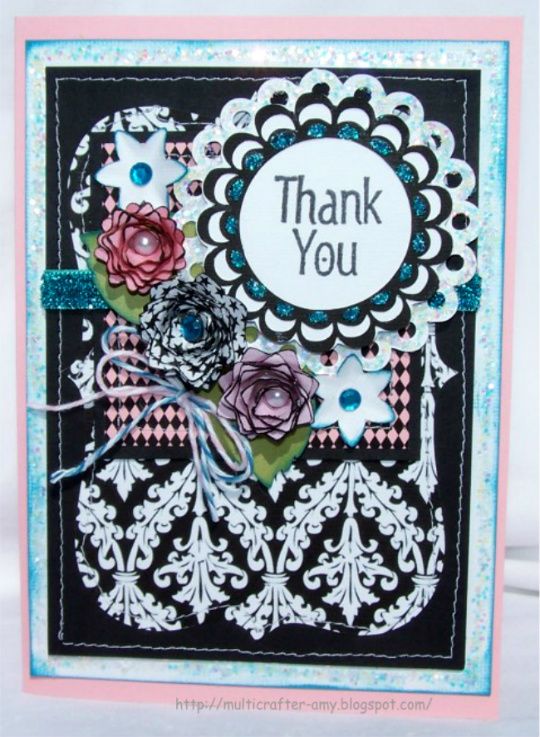
JINGER ADAMS DESIGN TEAM CALL - A THANK YOU CARD WITH SOME SPARKLE
Hi Everyone!
Jinger Adams is having a design team call for a her new line of Scrapbooking/Card Products. I am excited to see what Jinger comes out with and I want to be a part of the excitement! So I am trying out.
If you would like to try out for the the team also you can find all the information HERE. The deadline to enter is March 31st, so you need to hurry! I was busy finishing up some submissions for Cricut Magazine so I could not complete this till now.
The card I am posting today was fun to make. I broke out the glitter again. I had so much fun using glitter for the card I made for the Typecast Creative Challenge that I decided to use some again. My inspiration for this project started with a new package of Inkadinkado Thank You Stamps and a new roll of sparkly ribbon. I had to find a way to use them. I decided The black and white papers from the Black and White Cricut Imagine cartridge by Teresa Collins was a good choice.
The card is an A7 size card. I matted the card with white cardstock that I inked it with a turquoise blue ink pad and glued an edge of iridescent glitter all around. I then matted the card with a piece of black cardstock and attached a shape that comes on your Imagine and filled it with a print from the Black and White cartridge. I then stitched the two pieces of paper . Then I cut a piece of pink paper that was printed on the Imagine with the Black and White cartridge and matted it with a black piece of paper and stitched them together.
The flowers were all made from the Flower Shoppe cartridge and filled with colors from my Imagine. I inked the edges of the flowers with black ink before I rolled them. Then I attached some rhinestone and pearls to the center of the flowers.
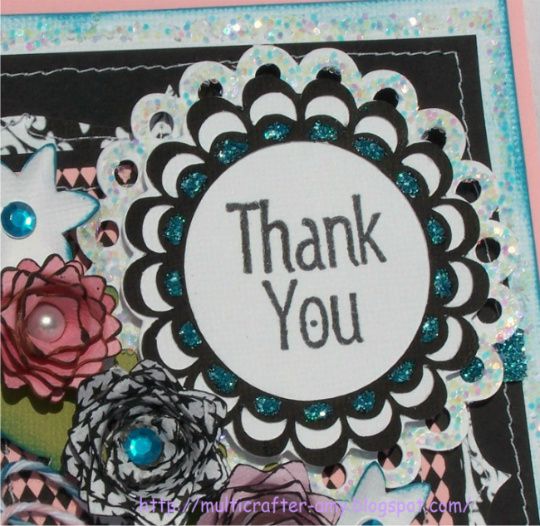
The Thank You stamp just fitted perfectly in the center. I added some Broken China Ranger stickles to the scallop to make it shine. On the scallop shape on the back I edged with more iridescent glitter. I made a bow from a few pieces of Trendy Twine and Twinery Twine.
Card size is A7 (5x7), cut from pink cardstock.
All the prints were from the Black and White - Teresa Collins Cricut Imagine cartridge
Elegant Edges
3" scallop1 on pg. 23
Lovely Floral
2.5" Doily2 and Doily2 shift (4th cut in pamphlet)
Flower Shoppe
3" exoctic 1 of star print
2.5" exoctic 1 light pink
2" exoctic 1 darker print
1" mum2 white cardstock inked with turquoise blue
2" fun5 9leaf) leaves inked with turquoise blue
Mat sizes:
(listed order of what you place on the card first)
White cardstock - 4 .75" x 6 .5 "
black cardstock - 4.25" x 6 "
Imagine preloaded shape @ 4" filled with print
black cardstock - 3.25" x 3.25"
pink cardstock printed on Imagine - 3" x 3"
Good Luck everyone!
Tuesday, March 13, 2012
My Memories Suite Review and a Giveaway & Discount Code
Hi everyone! I received an email a few months ago about doing a review and a giveaway for the MyMemories Suites 3V Scrapbooking Software and I am really excited with how easy it is to use and how the software functions. I do love to use paper and all that but I can see so many great possibilities for this software. I had so much fun playing with this software and it would be great for traditional scrapbooking. You can use it to do sketches for your scrapbook pages. It would be great to make several of the same scrapbooks for your family as gifts. I could see a new bride making memory books of her special day for her parents, in-laws, and Grandparents. She would only have to make the book once and just print as many copies as she wants.
I decided to make two different pages with the same pictures to show you how different you can make your layouts. Also all the pages and the elements came with the software. There are so many options for embellishments, you can keep yourself very busy. The good thing is you never run out of the embellishments or have to store them. I made these pages in a matter of minutes. It is an easy program to use.

These pages are of the guinea pigs we babysat during Christmas. They were so cute!
They have a great collection of digital scrapbook kits available at great prices and free ones. Also for my readers, My Memories Suite has offered to give you all a discount code for $10 off the MyMemories Suite Digital scrapbooking Software plus a $10 coupon for the MyMemories Suite store.
Just copy the coupon code below to take advantage of this discount:

You will want to check out their Facebook page too. They announce freebies and deals there!
Here are the ways you can enter to win a free copy of MyMemories Suites 3V Scrapbooking Software:
You get an entry for each task, please post each task in the comments on this post. You are not required to follow my blog but you will get another entry if you do.
1. Become a follower of my blog.
2. Go to digital scrapbook kits and tell me which kit is you favorite.
3. Like MyMemories on Facebook. Post on their wall that Multi Crafter Amy sent you and come back here and let me know you did.
Also here is a link to the MyMemories Tutorial. You can go there to watch a video on how to use the program. I will pick a random winner in two weeks.
Please leave a way for me to contact you. :)
I decided to make two different pages with the same pictures to show you how different you can make your layouts. Also all the pages and the elements came with the software. There are so many options for embellishments, you can keep yourself very busy. The good thing is you never run out of the embellishments or have to store them. I made these pages in a matter of minutes. It is an easy program to use.

These pages are of the guinea pigs we babysat during Christmas. They were so cute!They have a great collection of digital scrapbook kits available at great prices and free ones. Also for my readers, My Memories Suite has offered to give you all a discount code for $10 off the MyMemories Suite Digital scrapbooking Software plus a $10 coupon for the MyMemories Suite store.
Just copy the coupon code below to take advantage of this discount:
STMMMS70143
By using this code at MyMemories.com, you can get $10 off My Memories Suite (you get it for $29.97 instead of $39.97) AND you also get a $10 gift certificate to use in their online store!You will want to check out their Facebook page too. They announce freebies and deals there!
Here are the ways you can enter to win a free copy of MyMemories Suites 3V Scrapbooking Software:
You get an entry for each task, please post each task in the comments on this post. You are not required to follow my blog but you will get another entry if you do.
1. Become a follower of my blog.
2. Go to digital scrapbook kits and tell me which kit is you favorite.
3. Like MyMemories on Facebook. Post on their wall that Multi Crafter Amy sent you and come back here and let me know you did.
Also here is a link to the MyMemories Tutorial. You can go there to watch a video on how to use the program. I will pick a random winner in two weeks.
Please leave a way for me to contact you. :)
Thursday, March 8, 2012
Curt Jensen's BABY CARTRIDGE CHALLENGE
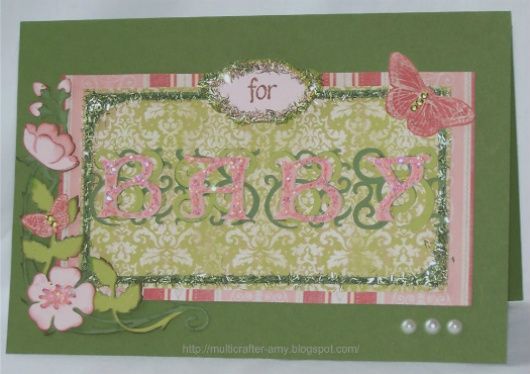
I decided to make a card for Curt Jensen's Baby Cartridges Challenge. He is a designer for ProvoCraft. Check out his Blog, Typecast Creative. Check out the contest HERE. The only problem is I don't have any of his Baby Cartridges (Word Collage (baby sign and embossing folder) and Stork's Delivery (Sugar & Spice font). Well that actually made me want to try this challenge. lol It's a bigger challenge and I love that. I do have Art Nouveau , Heirloom, and Fathers Day. I decided to go with Art Nouveau and Heirloom. I flipped through my booklets and put on my thinking cap. Below you will see what I came up with. I actually even have an idea of how to use the Fathers Day cartridge but I decided to save that idea for later. I jotted that one down in my sketch book. I wanted to showcase Curts cartridge art like suggested, so I limited all my cuts to his cartridge designs. You really can find the shapes you need in a cartridge if you look hard enough. (This time anyways.) I do have my go to cartridges for tags, labels, squares and such. I decided to make a Girl baby card. I love an excuse to make something Girly. I have three boys so to make something sparkly and pink is a treat for me.


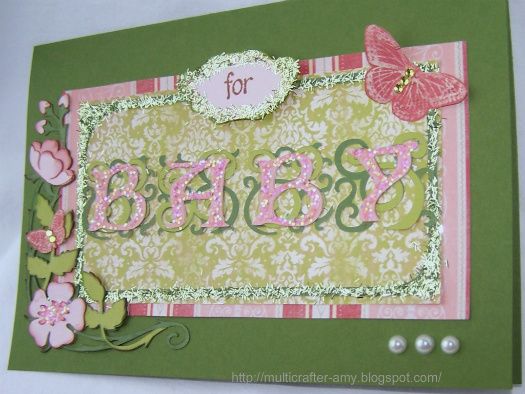
I turned the card here so you can see how it sparkles when you look at it from a different angle.
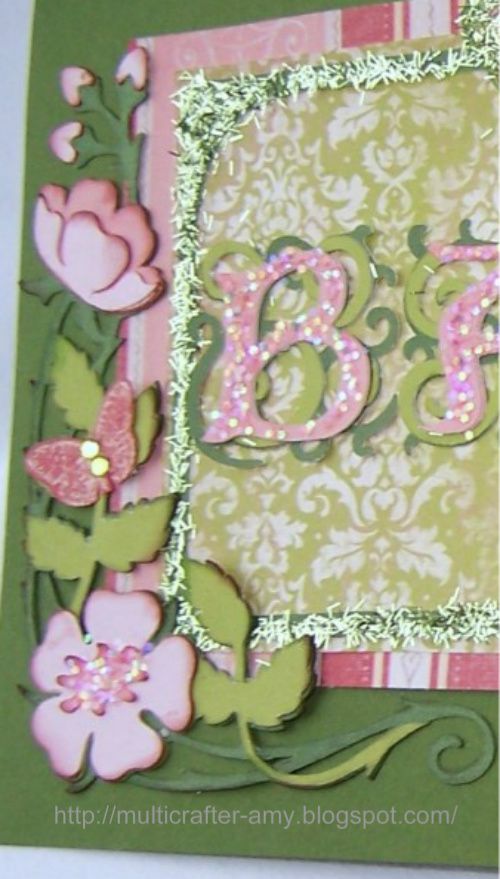
I used iridescent glitter for the letters (BABY)


This tag was also made with the Art Nouveau Cartridge. I inked the edges with green and then I glittered it. I pop dotted it on there.

I used tinsel glitter for the green frame.
I think it gives the card a mossy look .
I turned the card here so you can see how it sparkles when you look at it from a different angle.
I used iridescent glitter for the letters (BABY)
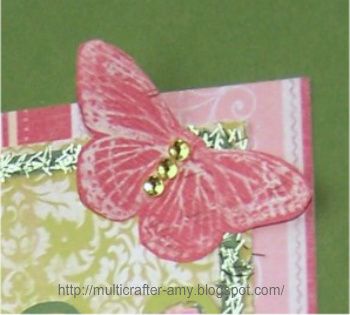
I cut out this butterfly from some of the paper found the Heirloom cartridge and placed a few rhinestones in the middle.

This tag was also made with the Art Nouveau Cartridge. I inked the edges with green and then I glittered it. I pop dotted it on there.
These were the cuts for my card:
All the cuts were made from Art Nouveau Cartridge and the printed paper is from the Heirloom cartridge. The card base is the only paper I did not run trough my Imagine.
I filled in the letters, tag, Square layers, frame and flowers with colors and prints found on Heirloom. I just printed a sheet of the butterfly paper out and cut out some butterflies by hand to get the butterflies accents and added some rhinestones. I inked all the leaves and flowers with a light brown ink pad.
- card was cut from a green cardstock I had on hand.
It measures 7.75 x 5.25. Its a A8 size card.
- cut at 4" filled with dark green
-cut Layer 1 at 4" (relative size) filled with light green
-cut Layer 1 shift at 4" (relative size) filled with dark pink
-cut Layer 2 at 4" (relative size) filled with light pink
-cut the letters (BABY) from Font 2 at 1" and fill with dark pink
-cut Font2 Layer for (BABY) at 1" (relative size) filled with dark green
-cut the Font2 Layer shift for (BABY) at 1" (relative size) filled with light green
For the Background:
- cut pg. 64 Font 2 shift at 3" true size and 2.5" rel filled with dark green (this is your frame)
- cut pg. 64 Font 2 Layer at 3.1 true and 2.5" rel filled with light green damask print
-cut pg. 64 Font 2 Layer at 3.5" true filled with the pink stripe paper
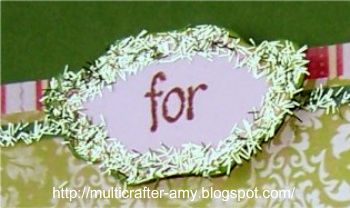
The for Label:
cut 1 pg. 66 Font 2 Layer shift at 1" true
(Flip it upside down.)
The Inside:
cut pg. 64 Font 2 Layer at 2.5" true filled with light green damask print
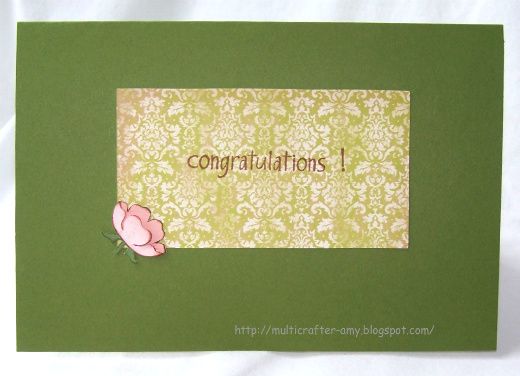
The flower on the inside was from a duplicate cut of the flower you see on the front of the card. Part of it did not turn out the first time I cut it.
I decided to add this good part to the inside of the card. lol
Stamps Used:
I used stamps from The Paper Studios / Stampabilities set called Everyday Expressions.
I also added three little pearls to the bottom right hand corner. It just needed something there.
You should be able to recreate this card with these instructions if you want.
Wish me luck!
UPDATE: My card won!!!
All the cuts were made from Art Nouveau Cartridge and the printed paper is from the Heirloom cartridge. The card base is the only paper I did not run trough my Imagine.
I filled in the letters, tag, Square layers, frame and flowers with colors and prints found on Heirloom. I just printed a sheet of the butterfly paper out and cut out some butterflies by hand to get the butterflies accents and added some rhinestones. I inked all the leaves and flowers with a light brown ink pad.
- card was cut from a green cardstock I had on hand.
It measures 7.75 x 5.25. Its a A8 size card.
- cut
-cut
-cut
-cut
-cut the letters (BABY) from Font 2 at 1" and fill with dark pink
-cut Font2 Layer for (BABY) at 1" (relative size) filled with dark green
-cut the Font2 Layer shift for (BABY) at 1" (relative size) filled with light green
For the Background:
- cut pg. 64 Font 2 shift at 3" true size and 2.5" rel filled with dark green (this is your frame)
- cut pg. 64 Font 2 Layer at 3.1 true and 2.5" rel filled with light green damask print
-cut pg. 64 Font 2 Layer at 3.5" true filled with the pink stripe paper
The for Label:
cut 1 pg. 66 Font 2 Layer shift at 1" true
(Flip it upside down.)
The Inside:
cut pg. 64 Font 2 Layer at 2.5" true filled with light green damask print
The flower on the inside was from a duplicate cut of the flower you see on the front of the card. Part of it did not turn out the first time I cut it.
I decided to add this good part to the inside of the card. lol
Stamps Used:
I used stamps from The Paper Studios / Stampabilities set called Everyday Expressions.
I also added three little pearls to the bottom right hand corner. It just needed something there.
You should be able to recreate this card with these instructions if you want.
Wish me luck!
UPDATE: My card won!!!
Wednesday, December 28, 2011
We have some guests over for the holidays.
My 10 year old son was lucky enough to have his name drawn to babysit the class Guinea Pigs. Four students brought notes of permission from their parents and they drew a winner. They are some cute little guys but they love to make a mess kicking stuff out of their cage. I love the sounds they make and watching them run around the cage. My boys are having a lot of fun holding them. It makes me almost want to go get a new dog for a pet but I think I will hold off on that a little while longer. We had dogs for over 15 years and I am not quite ready to train a new puppy.
I did not get much done this December as I had planned. I was sick for a while and then I had a sick husband and kid to take care of. I think I will just be making New Years cookies and candy instead of Christmas cookies. lol I did manage to cut out a few items on my Cricut but was unable to complete any projects. The only projects I did complete was some ornaments I painted for the new baby's in the family. Maybe now that Christmas is over I will be able get some stuff done.
Subscribe to:
Posts (Atom)